Registering and Managing a REST or LTI Application
Published: May 09, 2023
Last Update: March 20, 2024
This page explains how to register and manage a REST API or LTI application.
URLs used in this page such as devcon.blackboard.com, trial.blackboard.com or devone.com are examples. Replace with your own current URLs.
Once you sign into the Developer Portal with a registered account, your applications page says You don’t have any Applications registered yet.
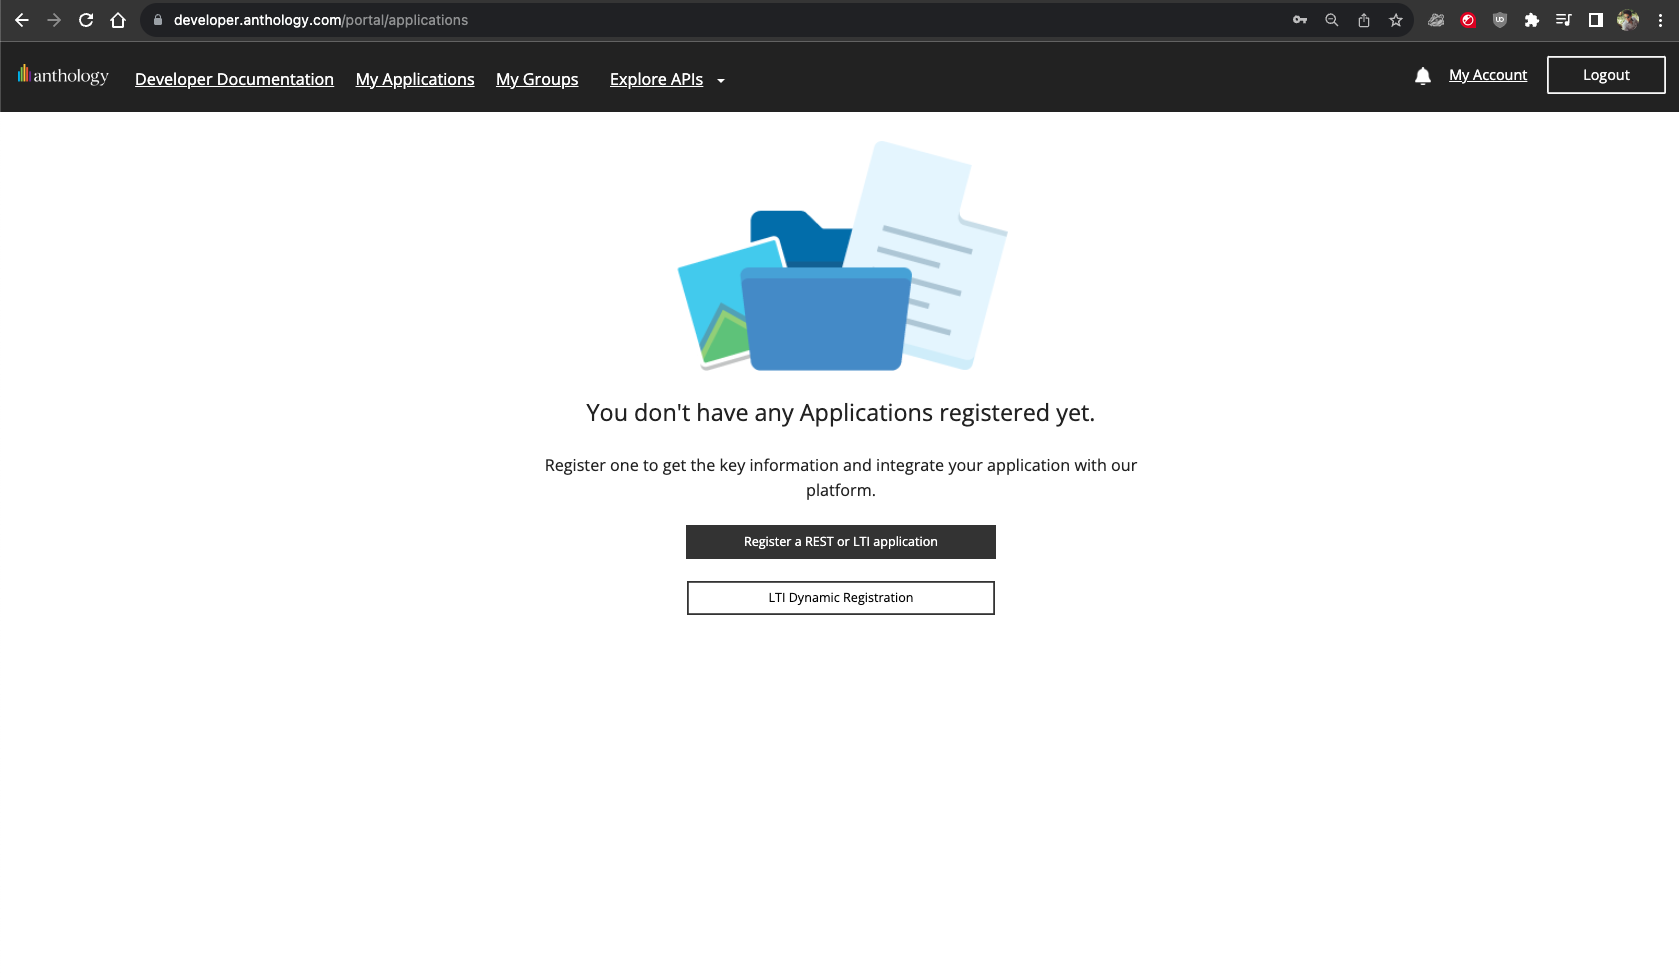
You can take two actions:
-
Register a REST or LTI application. Select to register a new REST or LTI application. If you already have an application registered, the button’s text is replaced by a + to add another application.
-
LTI Dynamic Registration. Read more about this topic in 1EdTech's documentation: https://www.imsglobal.org/spec/lti-dr/v1p0.
Register a REST or LTI application
Select Register a REST or LTI application to manually register a new REST API or LTI application.
Manual Registration of a REST API Integration
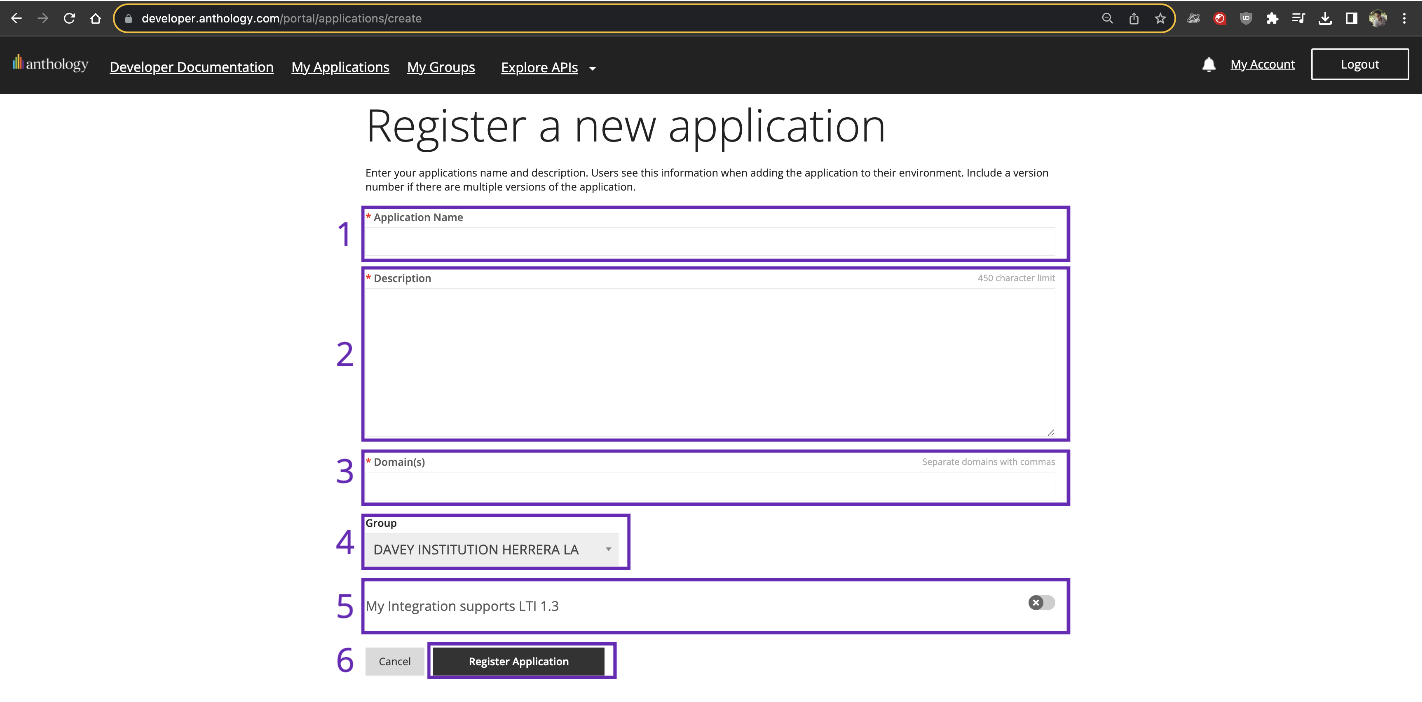
In the application form, enter your application information. Fields with a red asterisk (*) are required.
-
Application Name. Enter your application's name.
-
Description. Describe your application. Address who your application is intended for and what its main goal is. For example, "Grade Sync allows students and instructors to sync grades with our system and centralize them in the institution's system." Limit 450 characters.
-
Domain(s). Enter the domain address(es) you want to use without the http or //. You can enter several domains separated by commas (for example, devcon.blackboard.com, trial.blackboard.com).
-
Group. Add the group that this application is to be part of. A default group is added when you create an application. If you want to add your own group, read more about Groups.
-
My integration Supports LTI 1.3. By default, this option is switched off. Turn on if you need your application to support LTI 1.3. Blackboard only supports LTI 1.3.
-
Register Application. Once all information has been entered, select Register Application.
Manual registration of an LTI integration
To register an LTI integration, enter your application's information in the form as described in Manual registration of a REST API integration. Switch My integreaton supports LTI 1.3 to ON. This enables a second part of the form. Enter information required for the integration to communicate with your application on your end. These fields are explained in LTI 1.3 Fields.
- Login Initiation URL
- Tool Redirect URL(s)
- Tool JWKS URL
- Signing Algorithm
- Custom Parameters
Once complete, select Register Application.
Register Application
Once you have filled out and submitted the form, add the following information depending on the type of application you are registering.
Register REST API application
When you register a REST API application, you see three values that the developer portal returns. These are shown only once, and Blackboard cannot retrieve them. Make sure to document them for your records:
- Application Key
- Secret
- Application ID
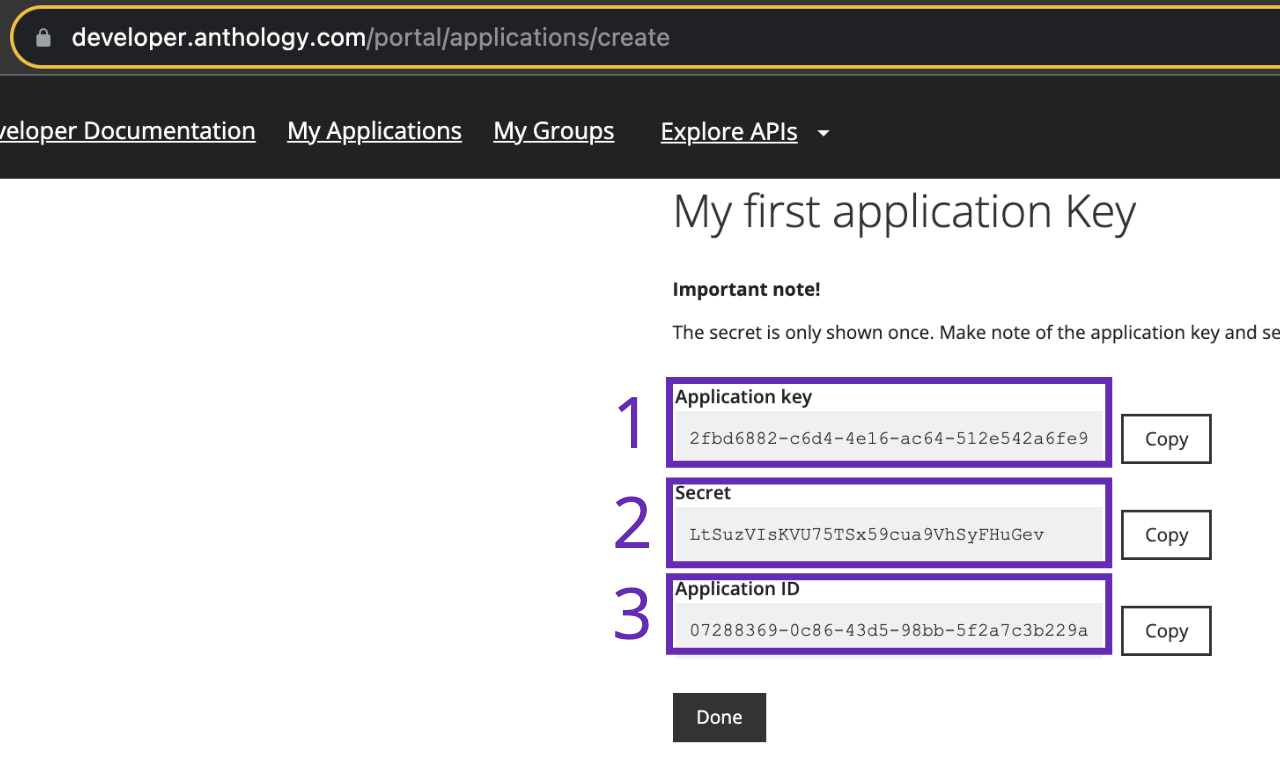
Once you record and verify this information, select Done to be redirected to My Applications.
Register an LTI application
When you register a LTI application, you will see seven values that the developer portal returns, These are shown only once, and Blackboard cannot retrieve them. Make sure to document them for your records:
- Application Key
- Secret
- Application ID
- Issuer
- Public Keyset URL
- Auth token endpoint
- OIDC auth request endpoint

Once you record and verify this information, select Done to be redirected to My Applications.
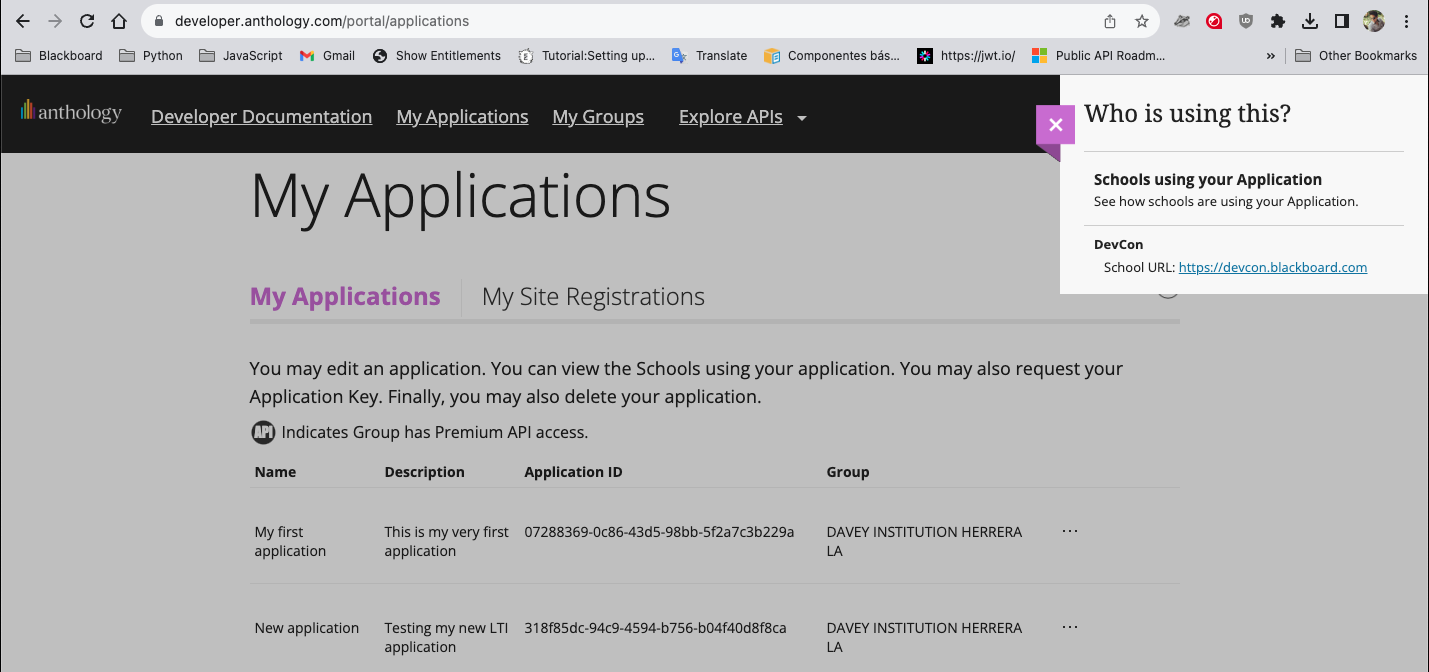
My Applications
On this application mangagement page, you can view and manage your REST API or LTI applications on your account.
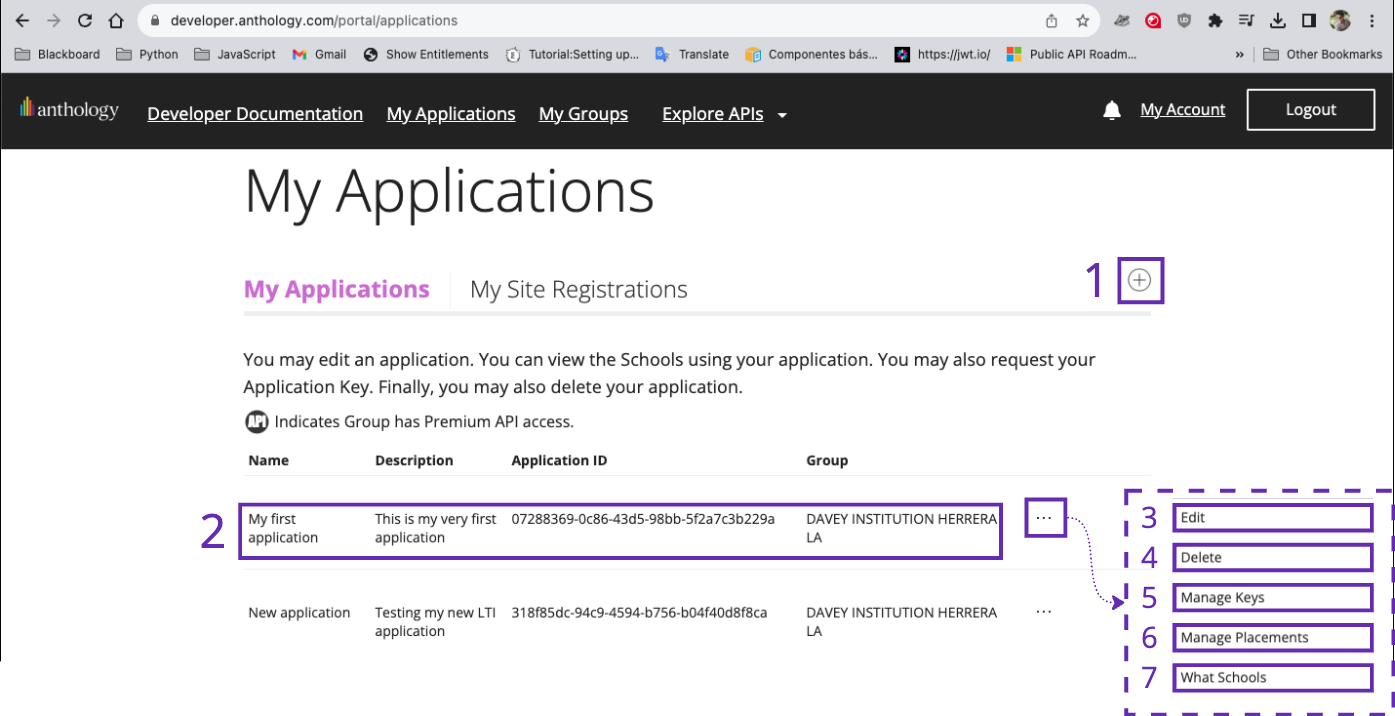
Here you will be able to:
-
Register a new application manually. For instructions to register a new application, see Manual registration of a REST API application or Manual registration of a LTI application
-
See the name, description, Application ID and group of the application. This data can be edited, except for Application ID.
-
Edit your application (General data including LTI endpoints). This returns you to the manual registration form where you can edit:
- Application Name
- Description
- Domains
- Login initiation URL
- Tool redirect URLs
- Tool JWKS URL
- Signing Algorithm
- Custom parameters
-
The following data cannot be edited:
- Data as Issuer
- Public keyset URL
- Auth token endpoint
- OIDC auth request endpoint
-
Delete your application. This removes your application. This is a one-way operation and cannot be undone.
-
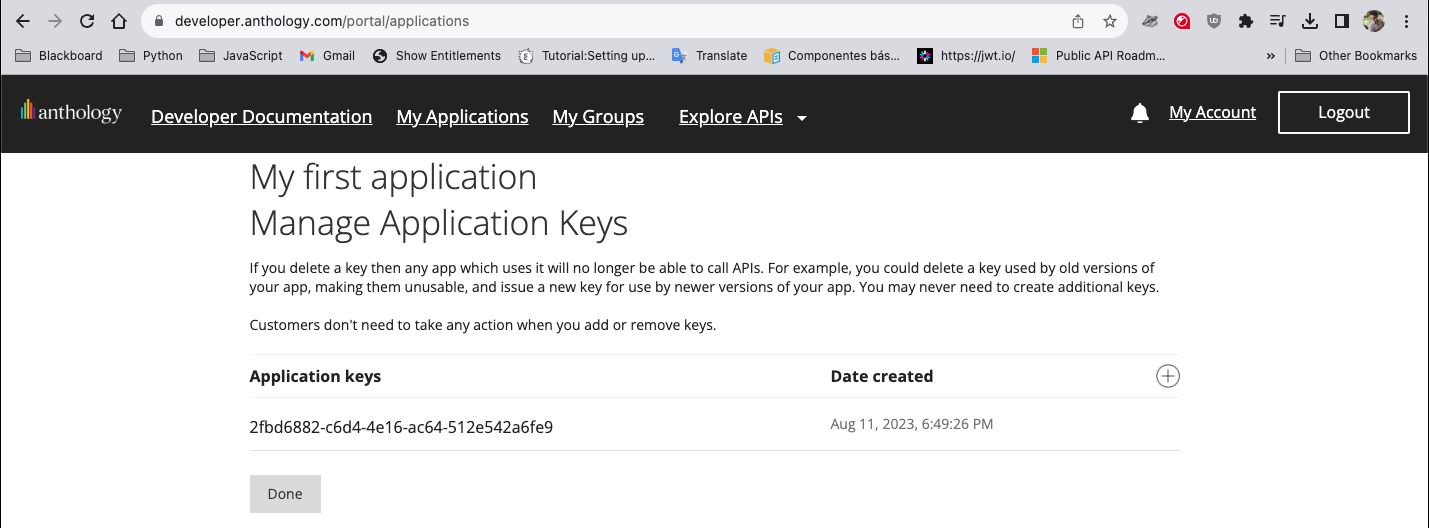
Manage your keys. You can create new keys (keys and secrets), but the application keeps the same application ID. This can be used when you want to rotate your keys or make an old key and secret unusuable. You may never need to create additional keys. When you select +, it will generate new values that will be shown only once. Document and store them in a safe place because Blackboard is unable to retrieve this data.
-
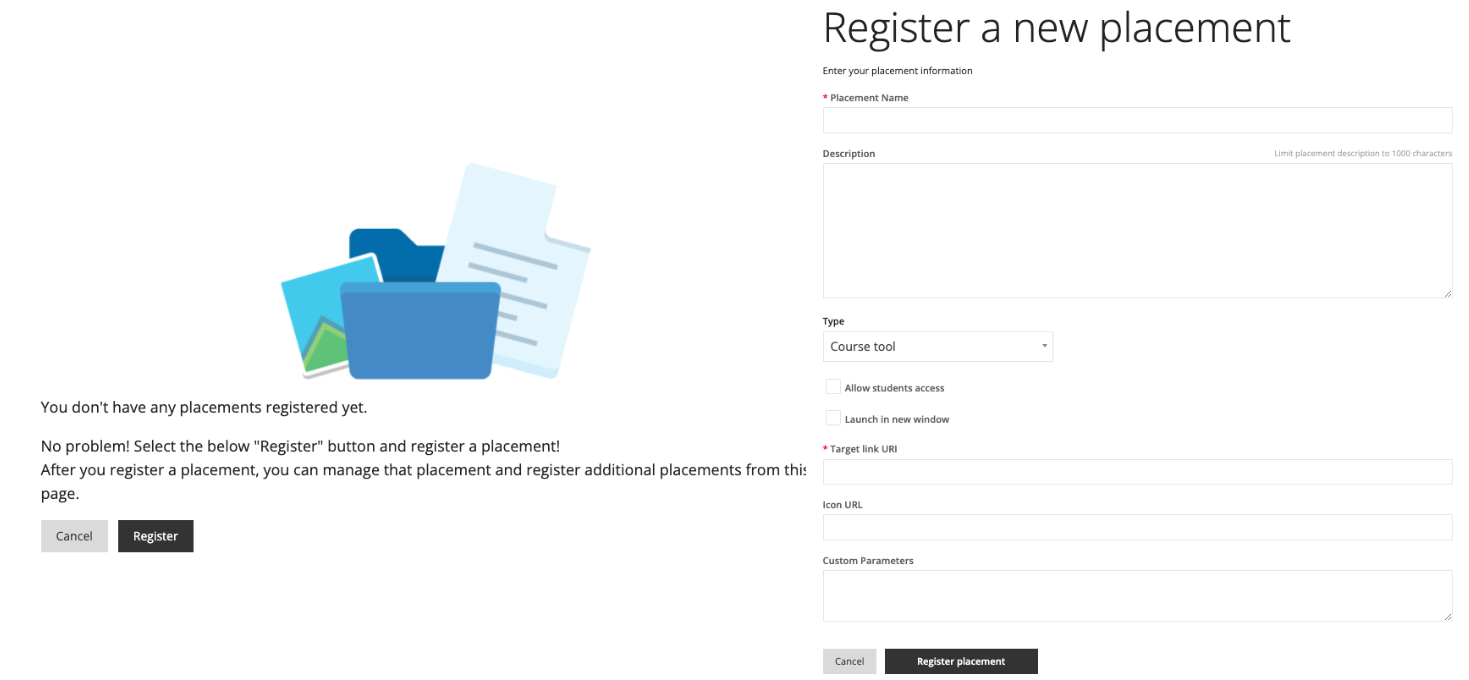
Manage your application's placements. Register a placement (LTI) that is applied whenever a new client adds this placement to their own Blackboard LMS instance and switches it ON. Enter the following data:
- Placement name
- Description
- Type (Course Tool, Course content tool, deep linking content tool, System tool, administrator, ultra extension)
- Allow student access and/or Launch in new window target link URI
- Icon URL
- Custom parameters
-
Review the schools that have integrated your application. At the top right of the page, view a list of sites that are registered and using your application. this is how it looks by default:
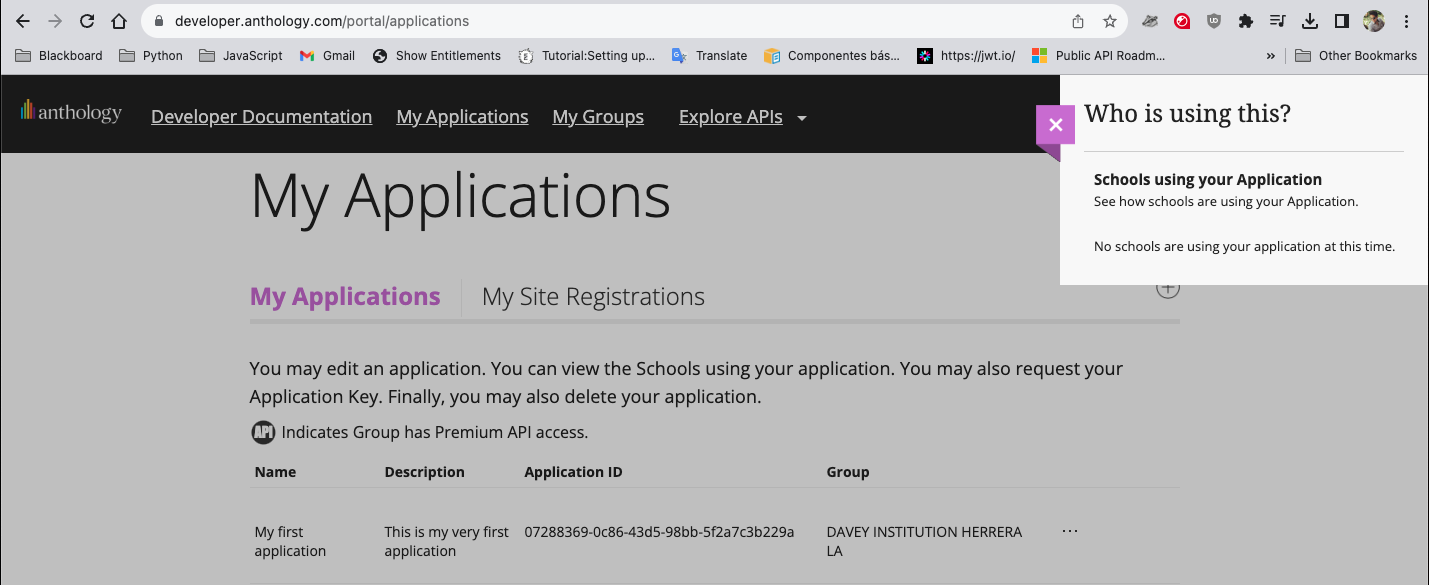
- This is how it looks like when you have already registered an application:
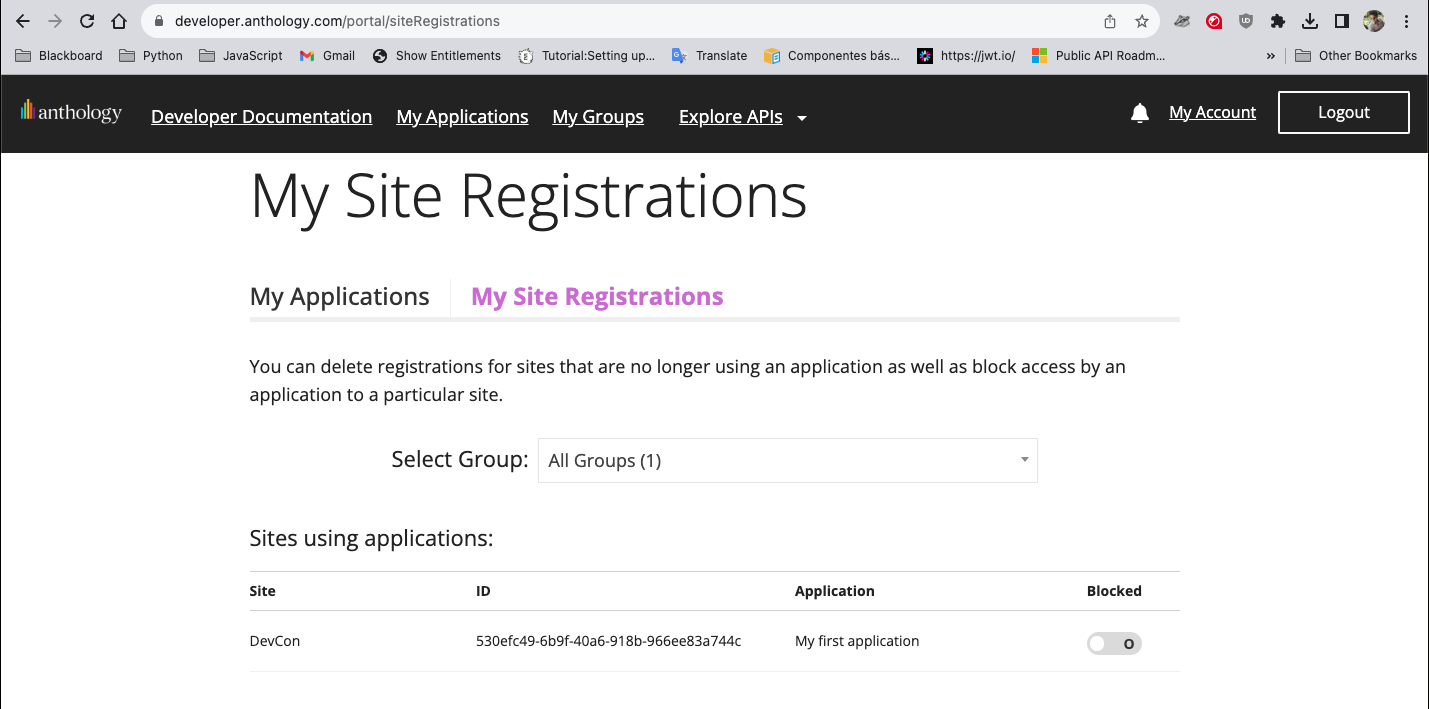
My Site Registrations
On this tab, can delete the registrations for sites that are no longer using your application. You can also block access to a particular site on a specific group, which makes it default to All groups. You will not see any registrations for a newly registered application.
When a site is registered it will be displayed here and it will look like this: