Working with UEF
Published: Not Available
Last Update: October 11, 2024
In its core, the Ultra Extension Framework leverages the Core LTI 1.3 and REST API frameworks to provide an authentication mechanism, allowing you to focus on delivering the information based on the user making the request.
The way UEF works is by injecting a JavaScript file at loading time into the Ultra window, which creates a two-way communication tunnel (based on the MessageChannel interface). This file will serve as the bridge between the Ultra window and your external services and will provide an entry point for customization.
The flow
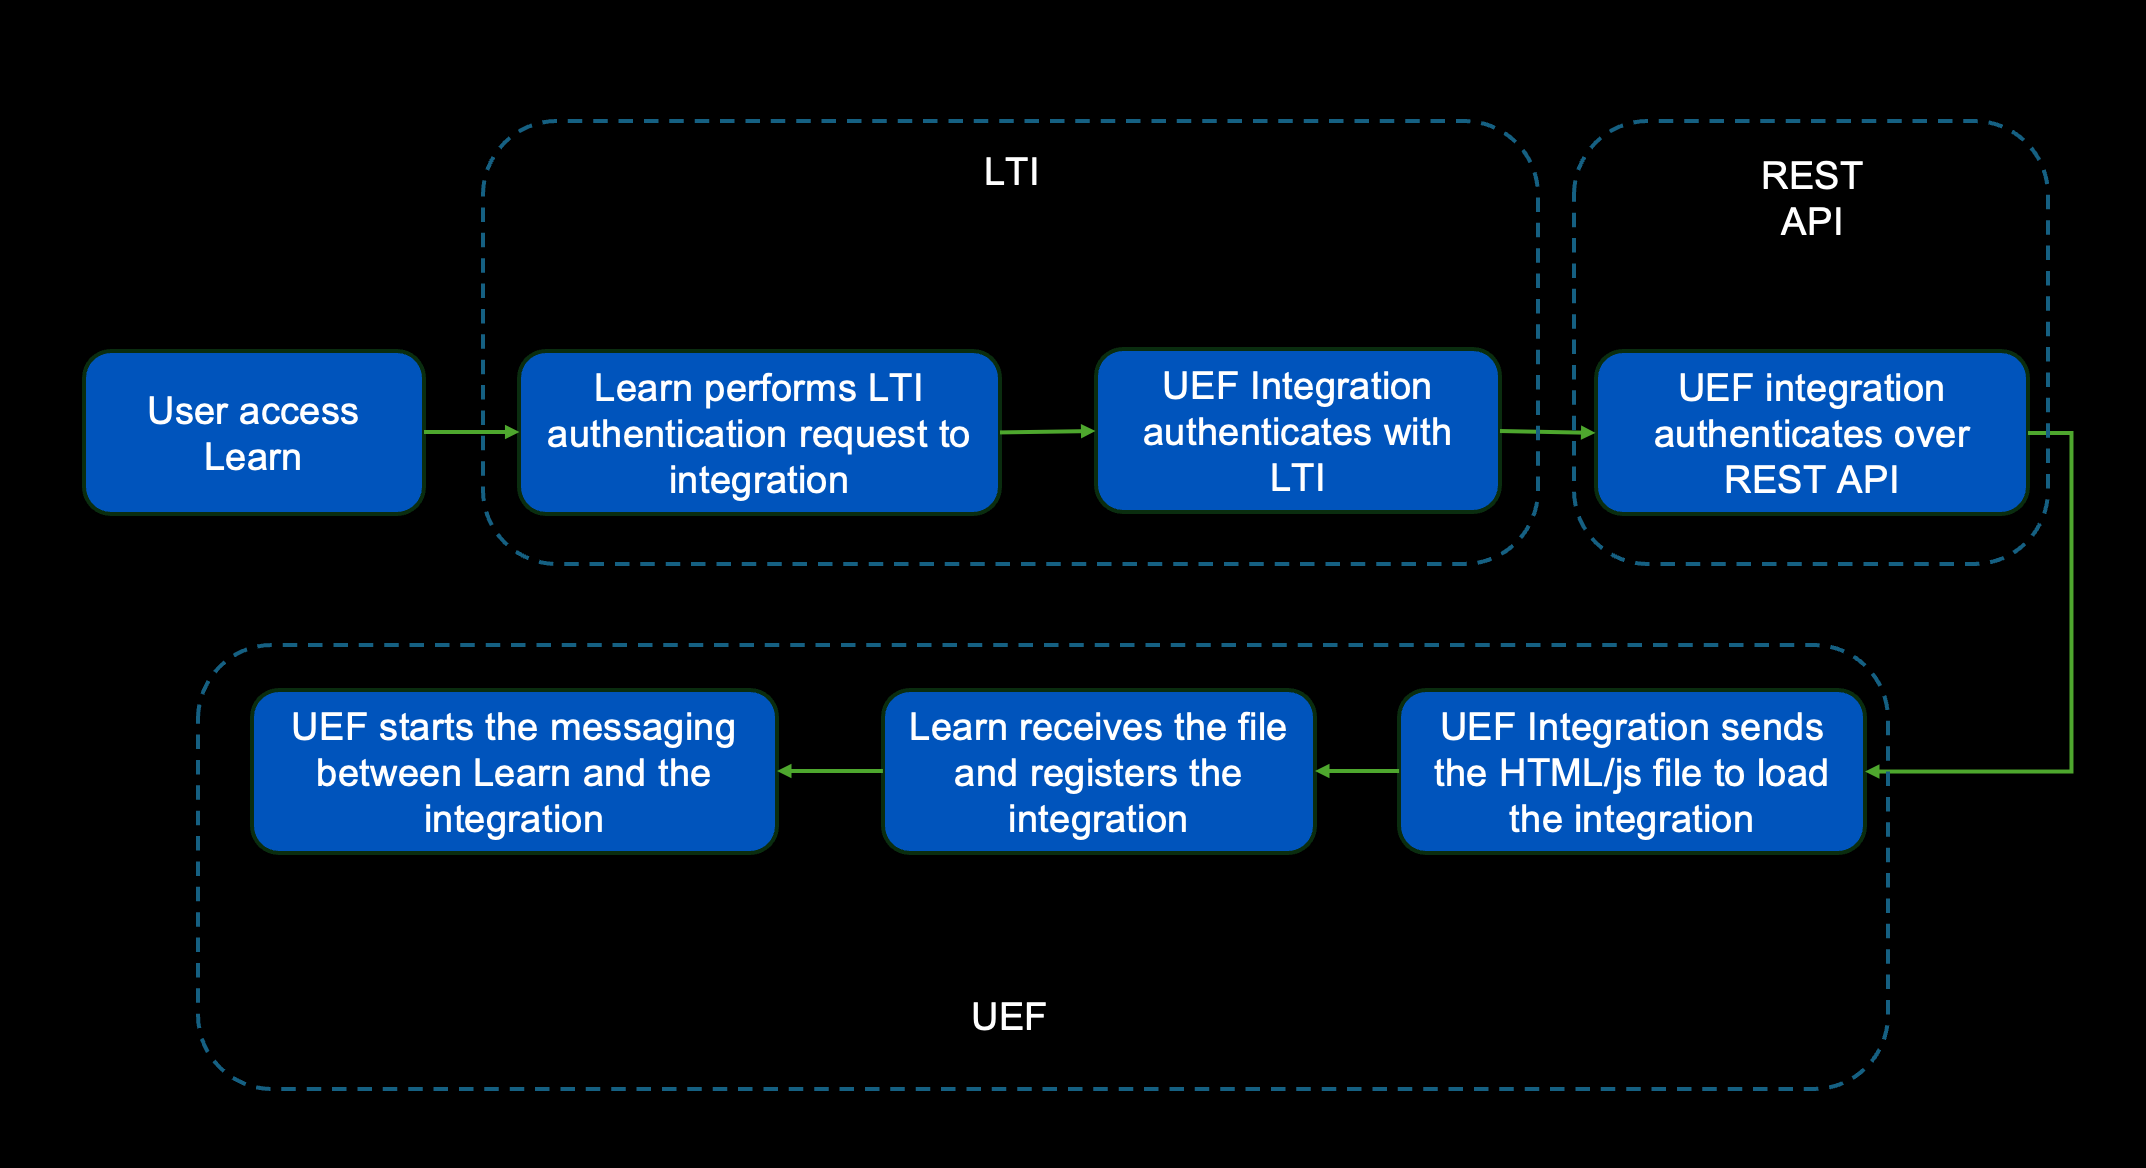
As mentioned above, the framework uses LTI 1.3 and REST API to perform an authentication phase and ends up with the injection of the file into the browser window. The following diagram describes this scenario and how everything interconnects, each step is described below:
User Access
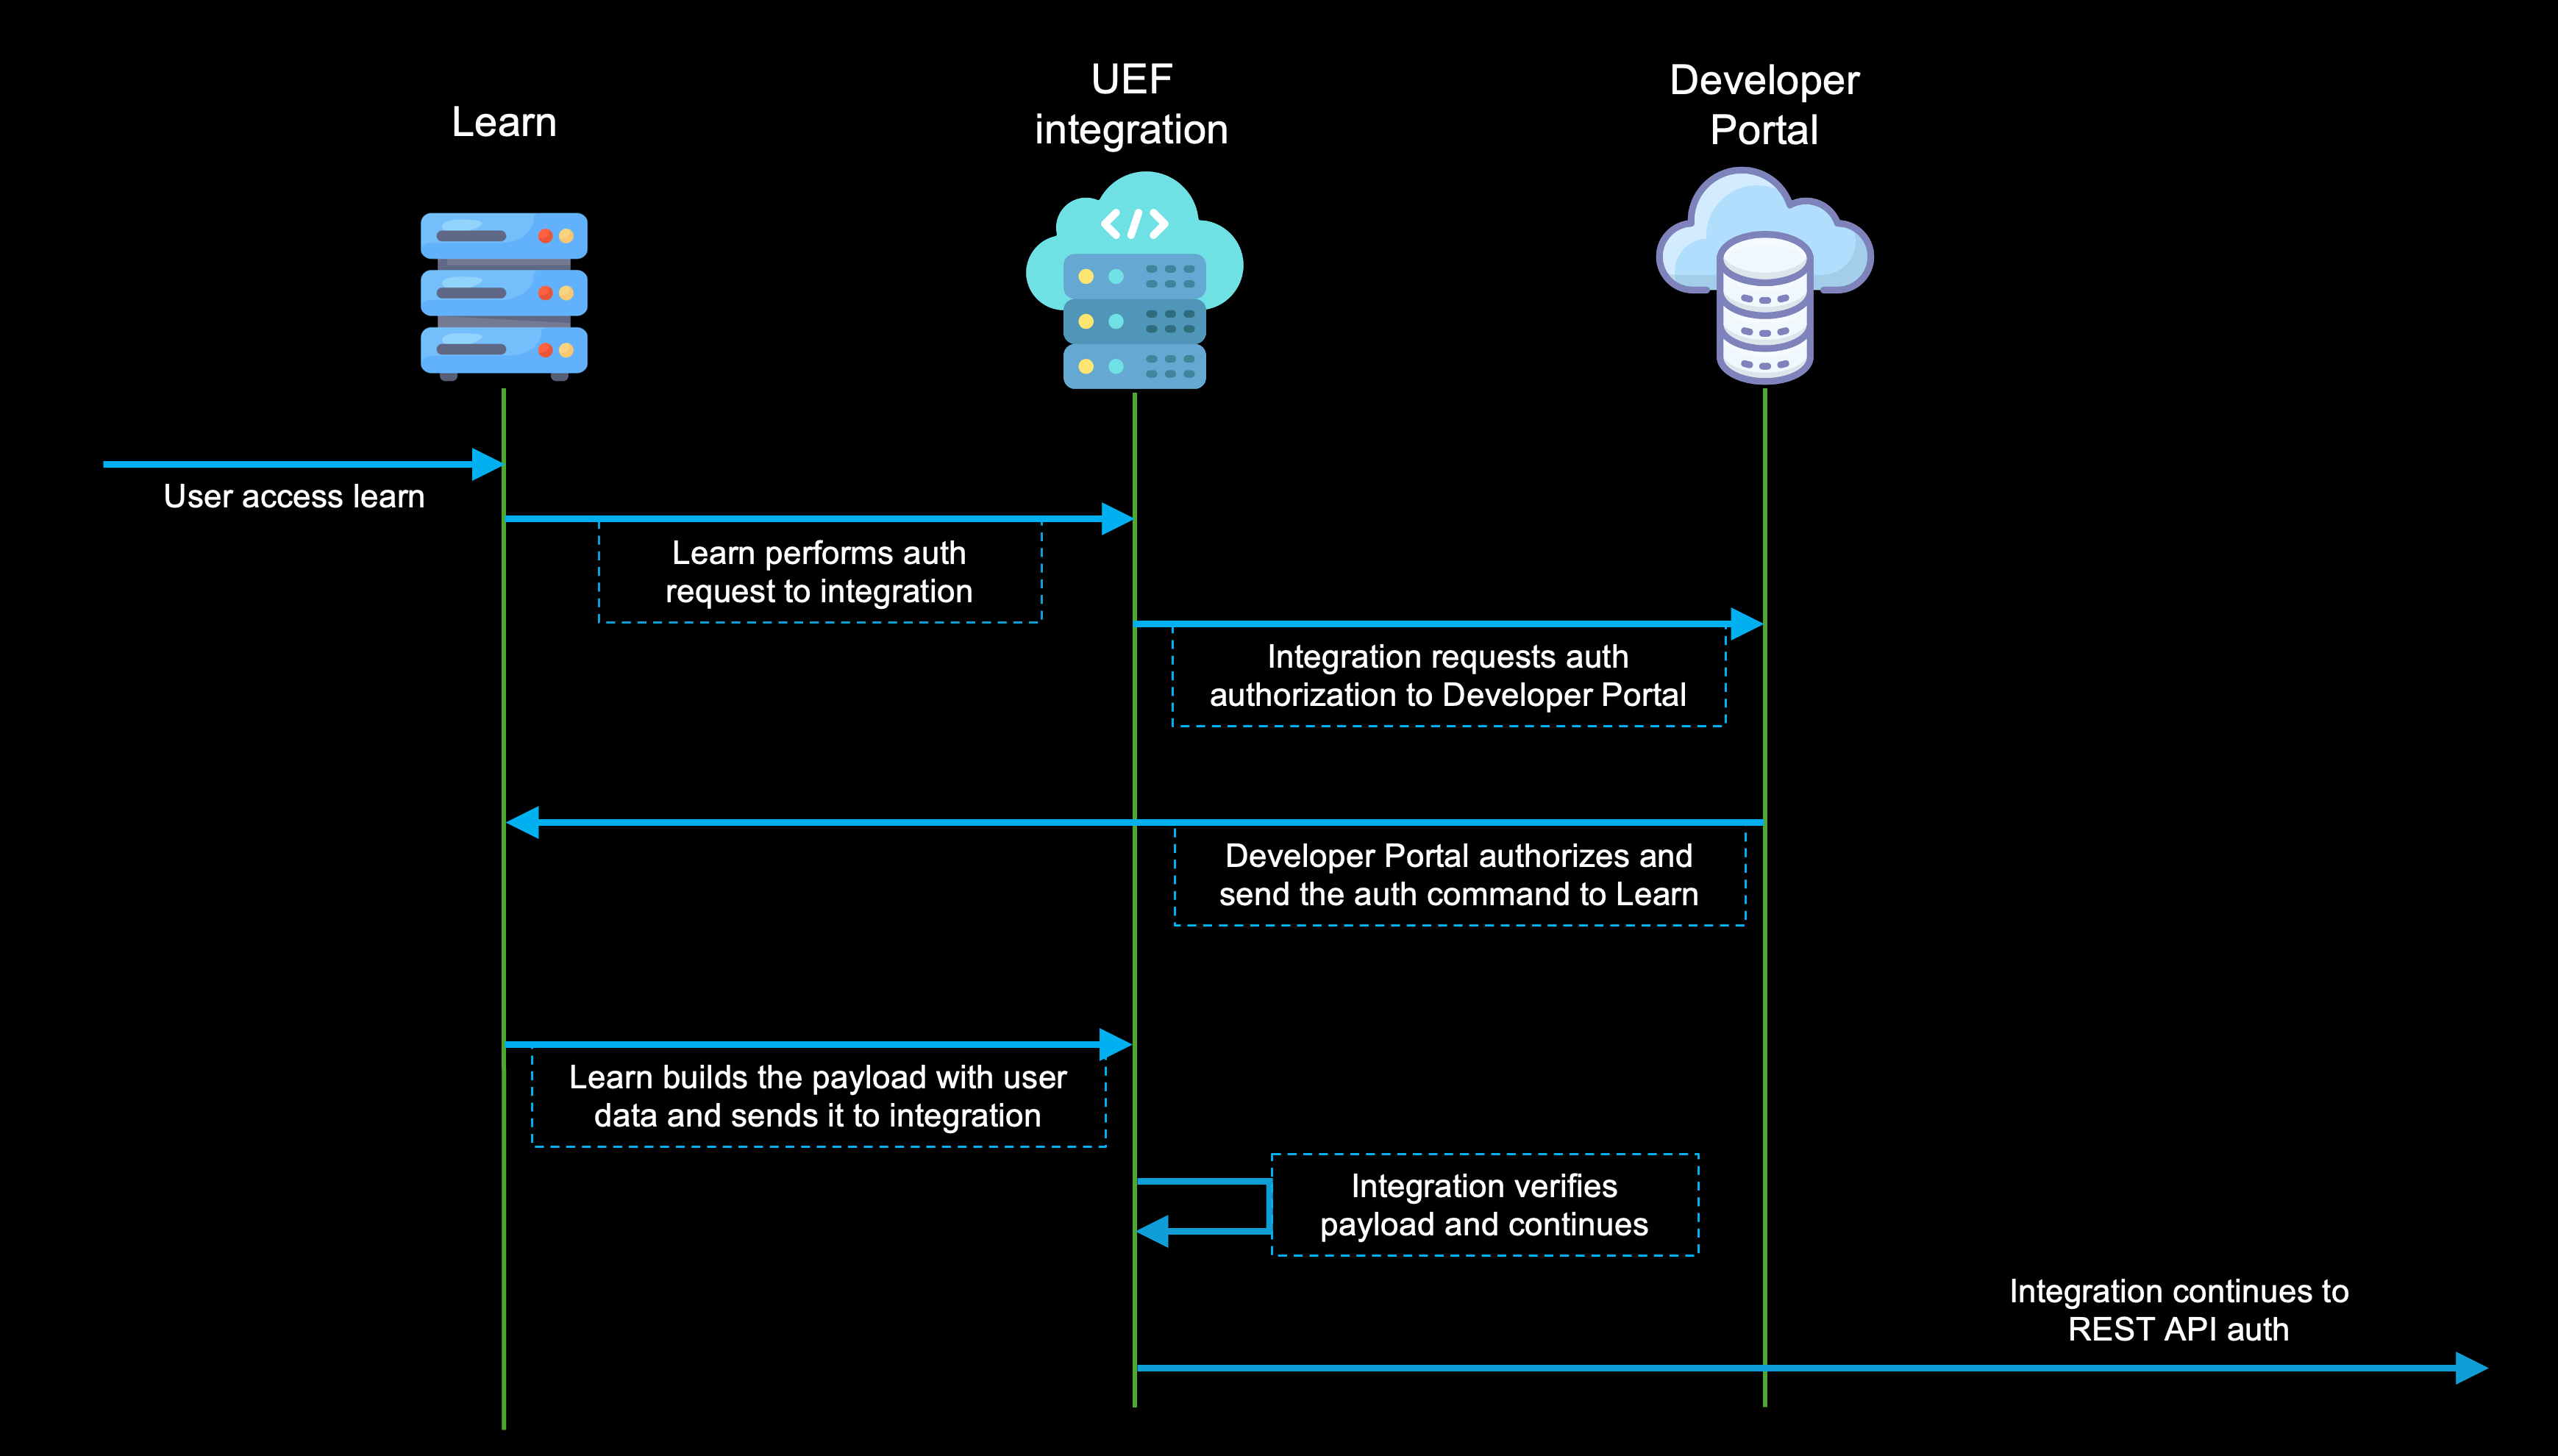
By definition, the UEF integration triggers and performs the LTI call when the user logs in to Learn, the user doesn't have to perform any authorization process and all happens in the background.
LTI block
This block follow the same process for an LTI Message Flow described by the Core LTI 1.3 specifications, this will verify that the integration is allowed to perform operations within the Blackboard LMS server and will review if the user is allowed to launch the integration. Below is a brief overview of the LTI flow, for more information about this, flow please refer to LTI Message Launch Flow:
REST API block
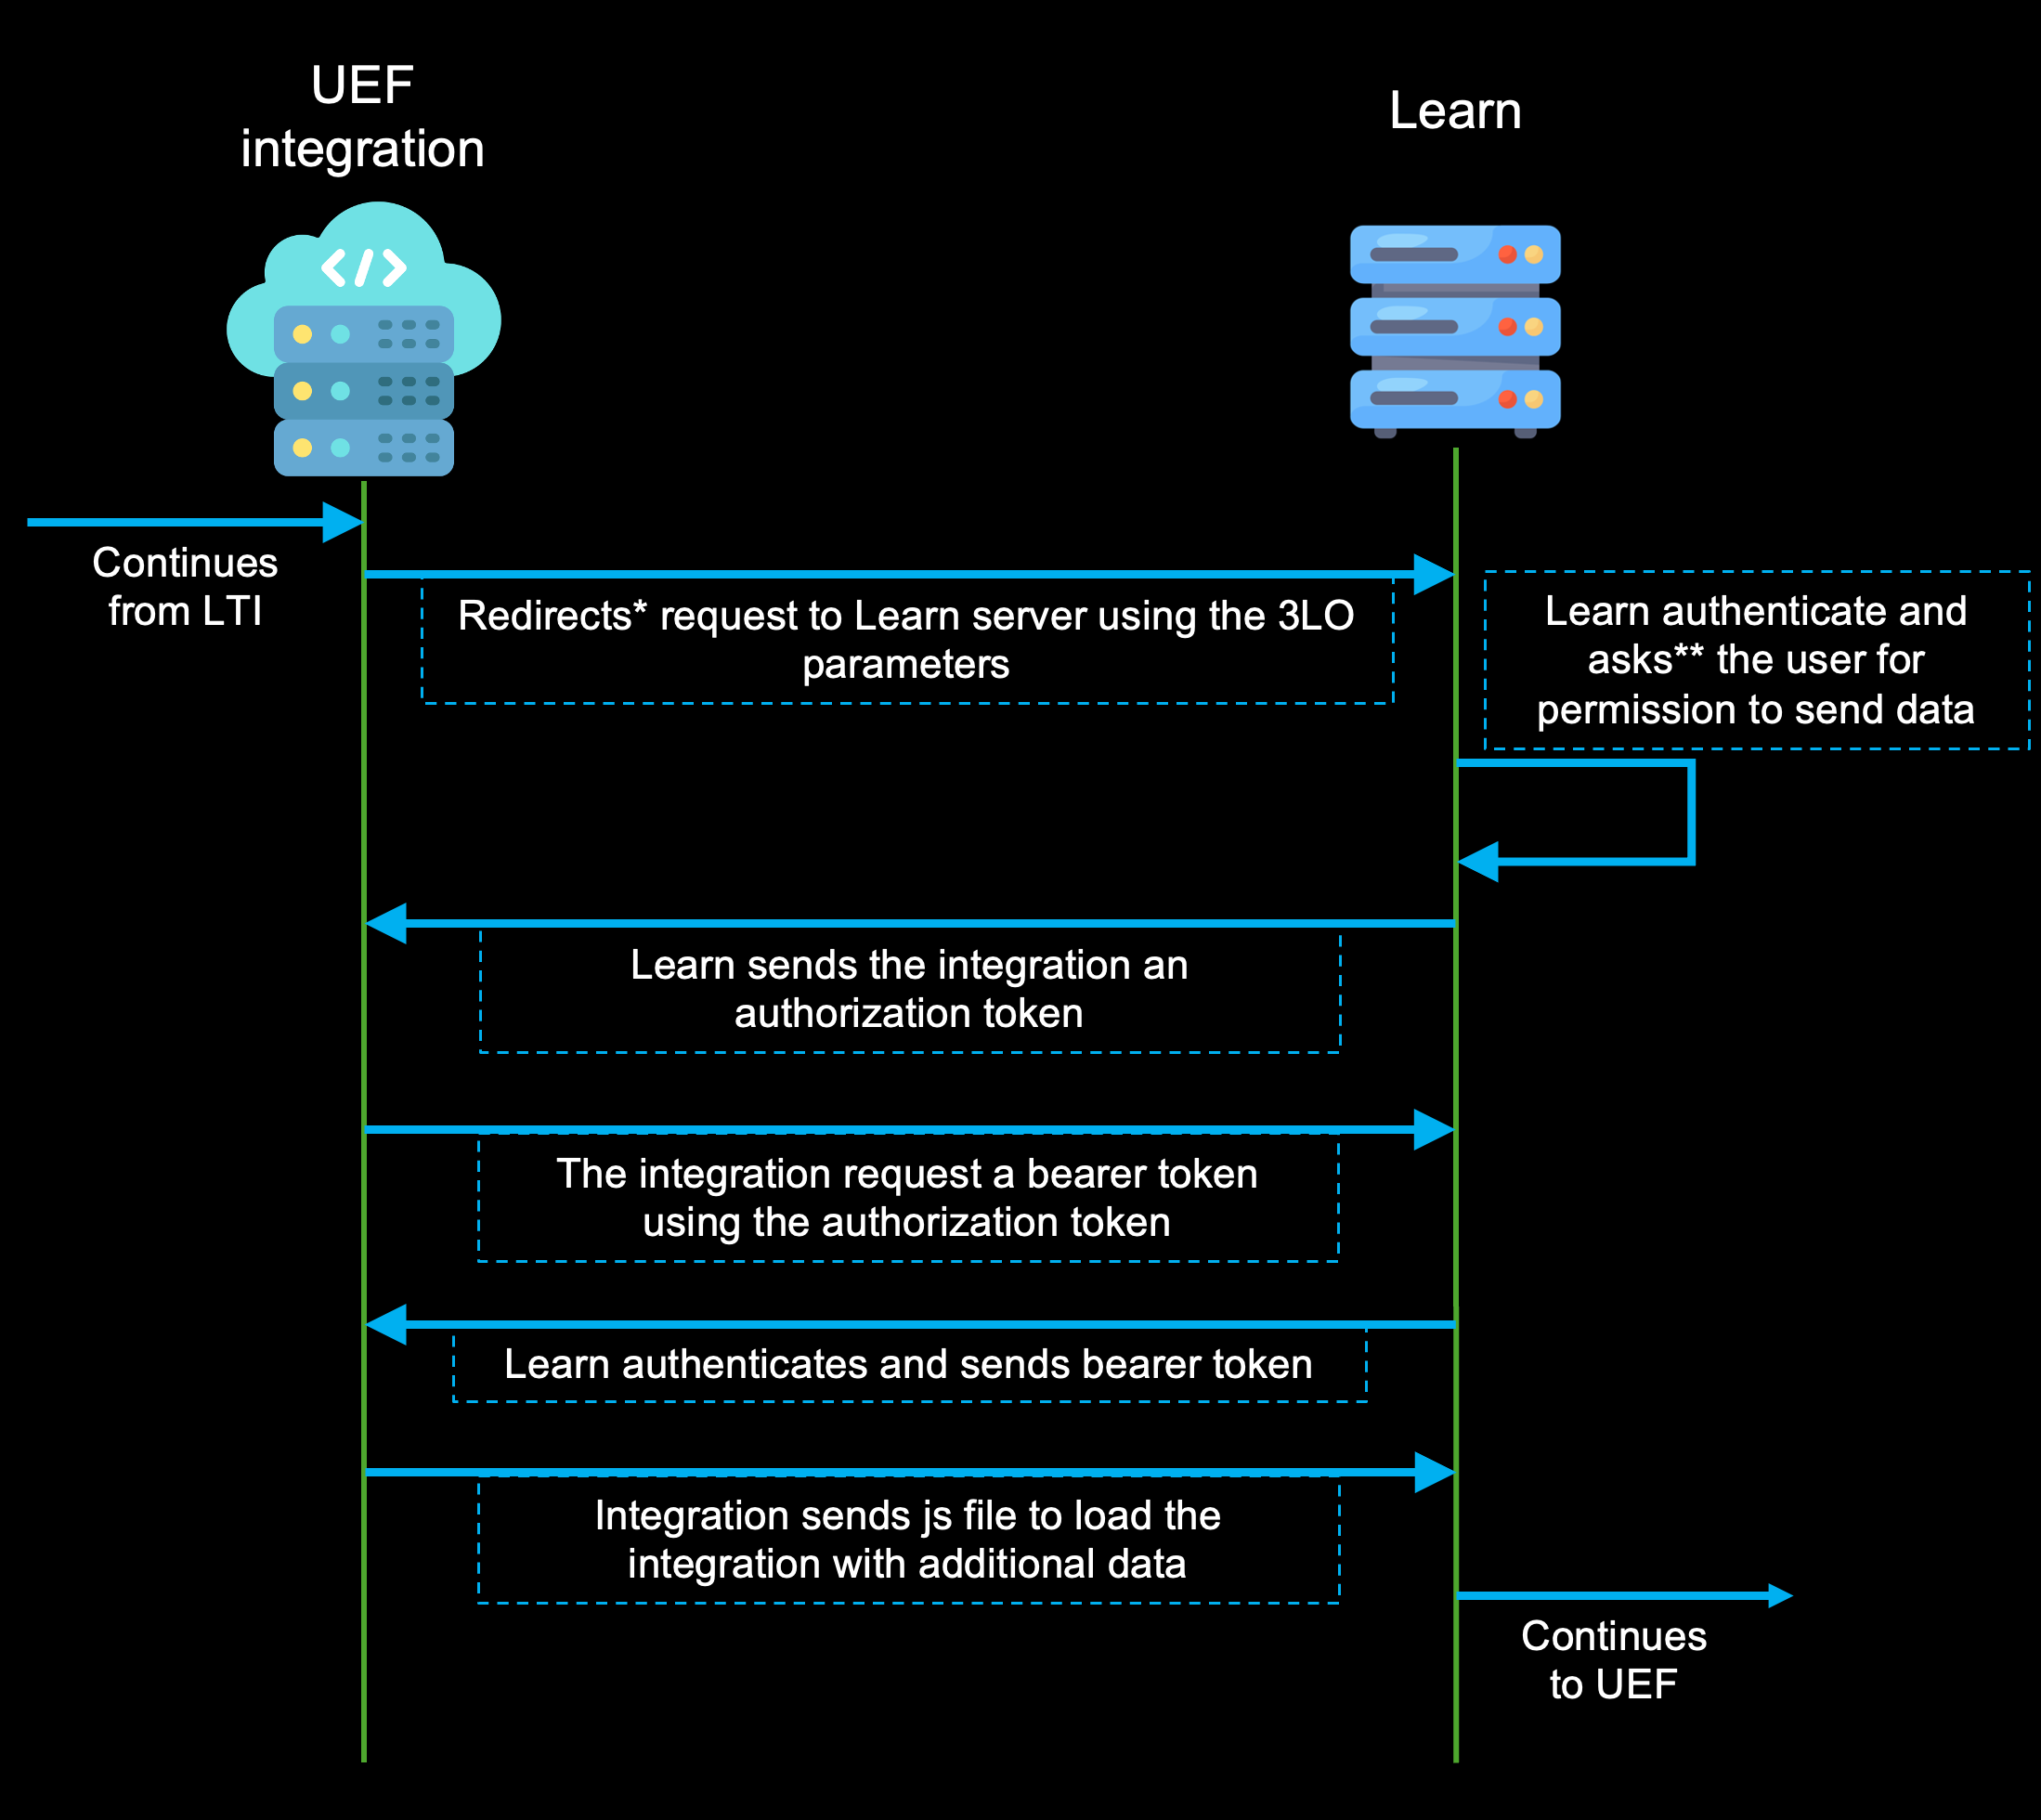
Once the LTI step is completed and Learn has sent to your tool the JWT token containing all the information about the user and context, you need to redirect the request to the REST API authentication endpoint to start a 3-Legged OAuth flow which will give you a bearer token tailored to the user's privileges and entitlements. This process follows the standard 3-Legged OAuth flow described below, for more information about this flow, please refer to 3-Legged OAuth
Based on the application you want to integrate, you can scope the token to just a few privileges, the following is a table where you can see the available scopes for UEF and their definitions
This table lists all the available scopes and what you might need them for.
| Scope name | Syntax | Associated Events |
|---|---|---|
| ALL_AUTH_TYPE | * | Gives all scopes |
| ANALYTICS_AUTH_TYPE | “ultra:analytics-event” | click,hover |
| HELP_PROVIDER_TYPE | “ultra:help” | help:register |
| PORTAL_AUTH_TYPE | “ultra:portal” | portal:new,portal:remove |
| PORTAL_MODAL_AUTH_TYPE | “ultra:modal” | portal:modal |
| PORTAL_NOTIFICATION_AUTH_TYPE | “ultra:notification” | portal:notification |
| ROUTE_AUTH_TYPE | “ultra:route-event” | route,route:changing |
This step is required since the UEF integration uses the user bearer token to provide access to the Ultra UI and allow the rendering and addition of services.
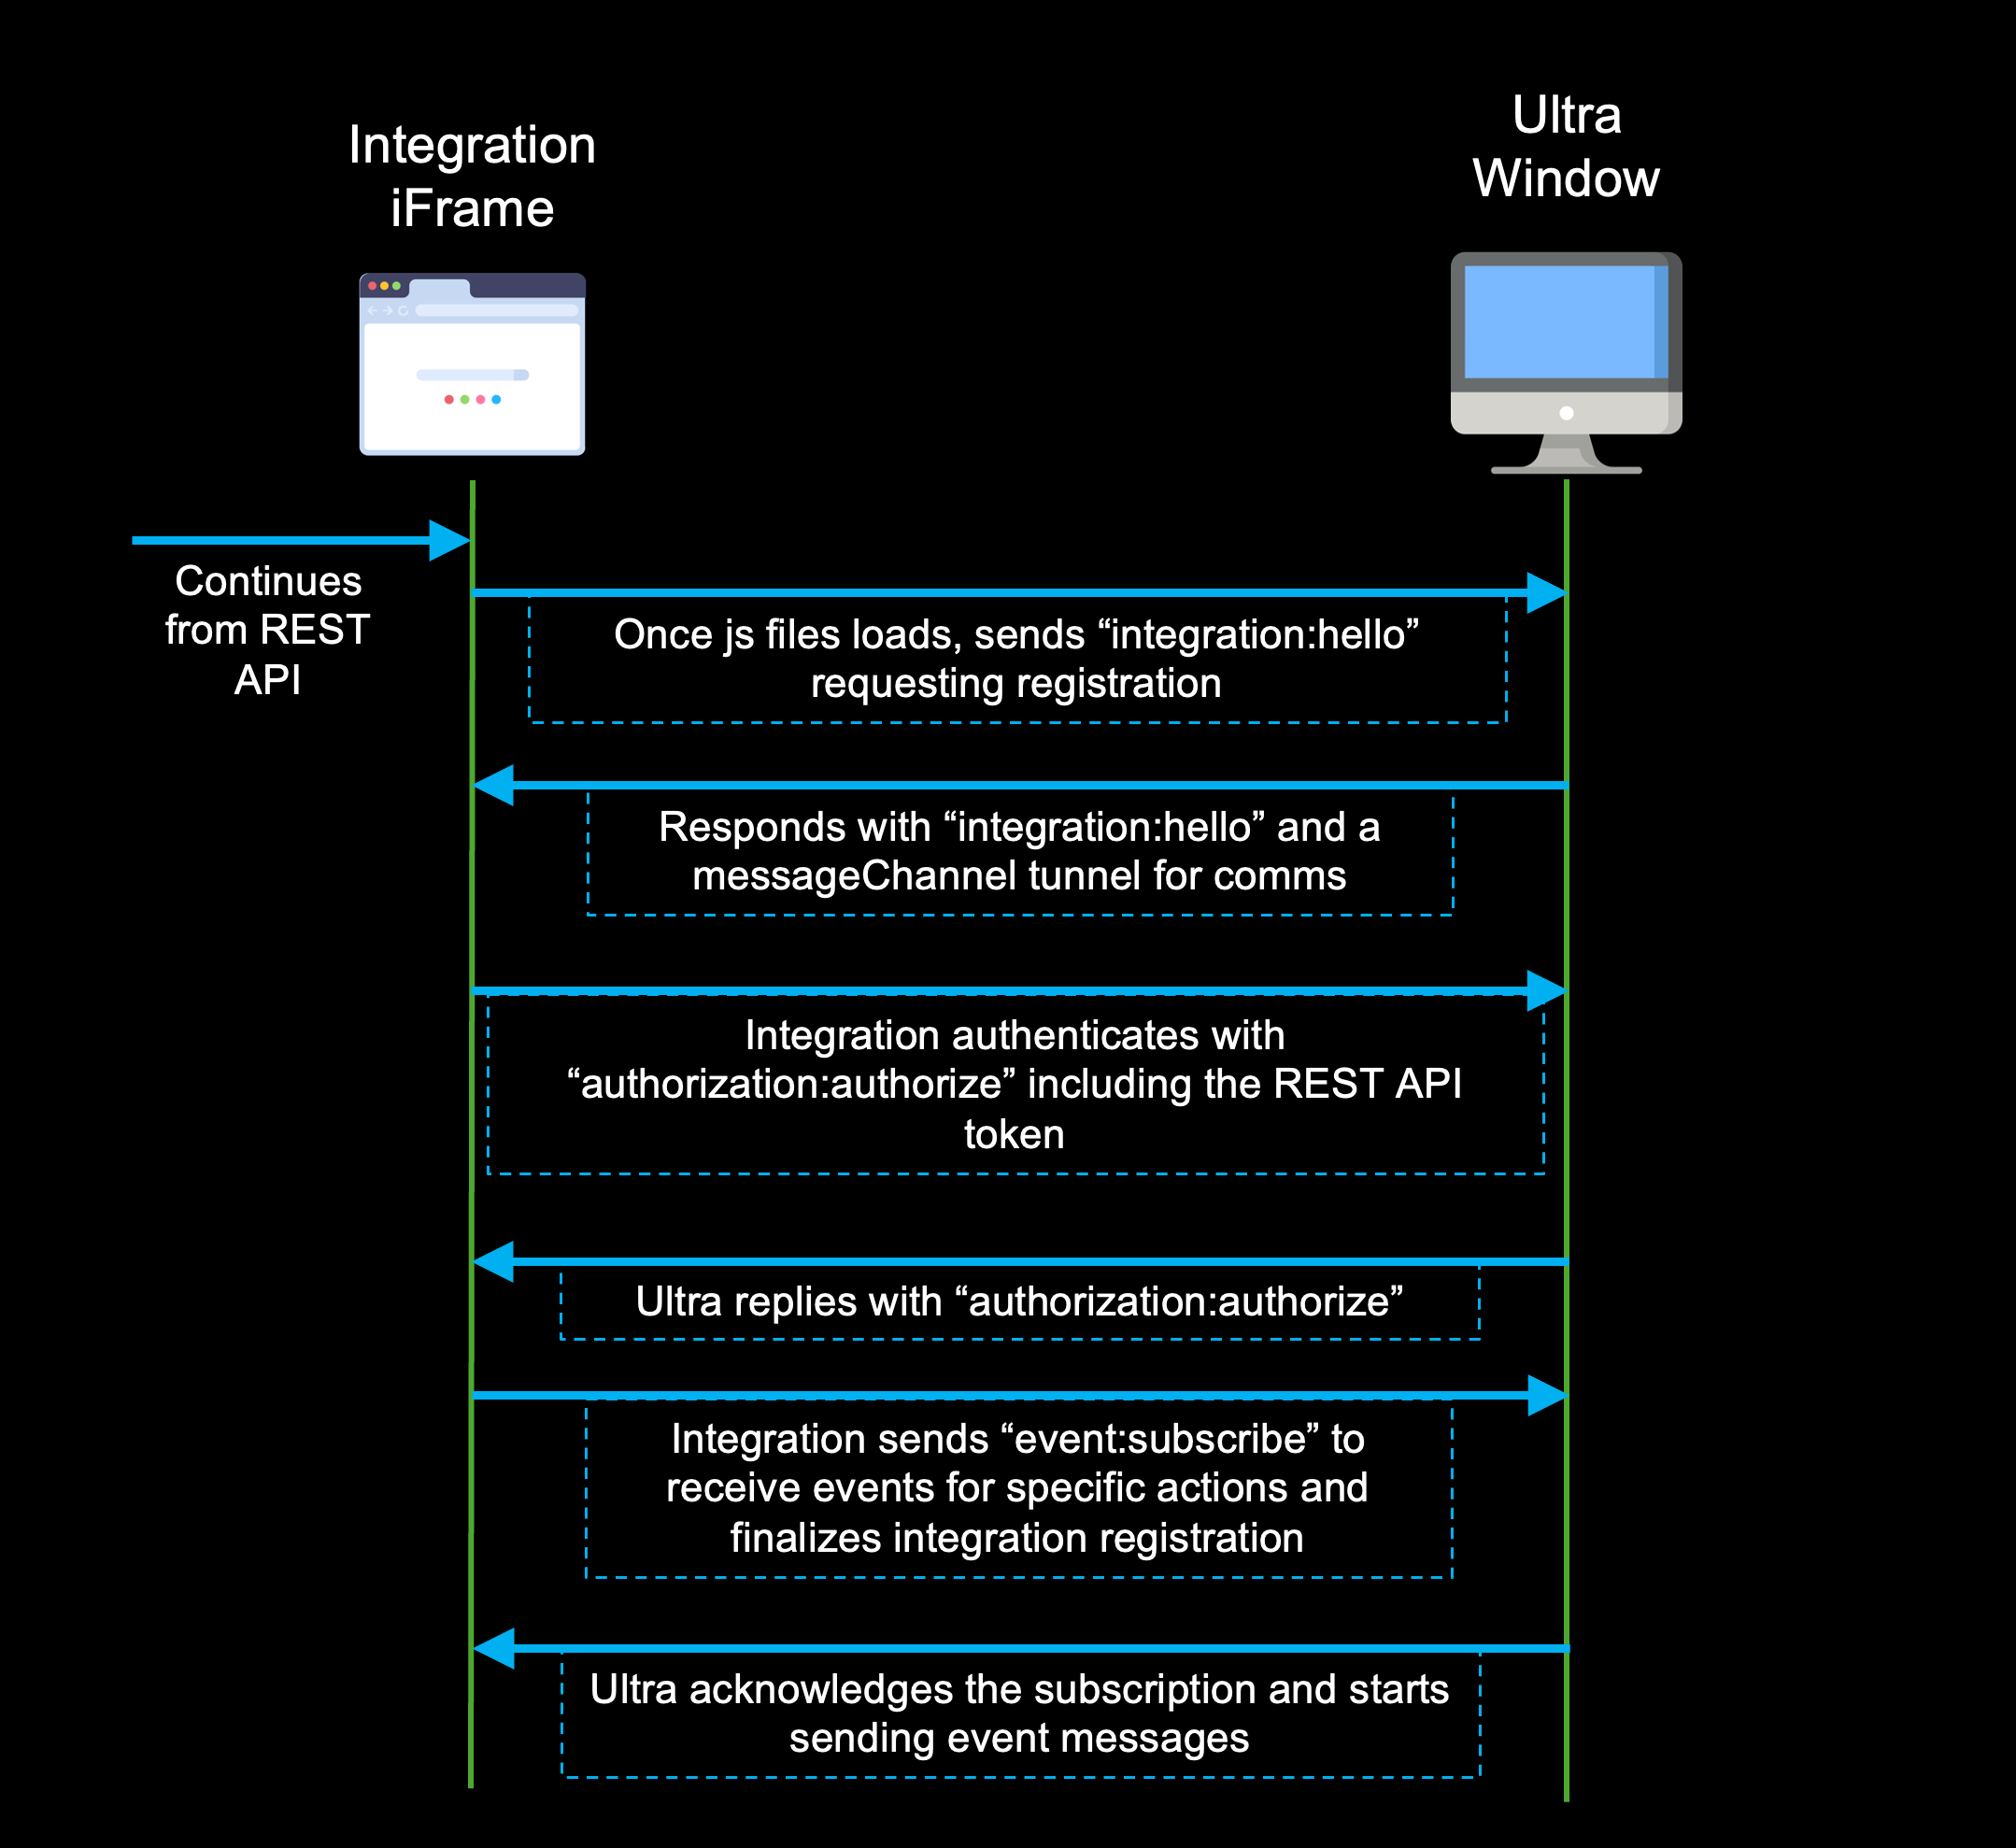
UEF Block
Once the REST API authentication is authenticated, your tool redirect to an HTML page where you can add your JavaScript file for injection, along with the bearer token received from the previous block. A simple example of this page can be found below
HTML page with JavaScript injection
<!DOCTYPE html>
<html lang="en">
  <head>
    <title>Injecting the JS file</title>
    <script src="<route-to-your-js-file.js>" defer></script>
  </head>
  <body>
    <p id="bearer-token">bearer-token-from-rest-api</p>
  </body>
</html>
From here, you can authenticate to UEF using the token which will create a private communication tunnel between your JavaScript file and Ultra, allowing you to render UI components, add links, create course banners, etc.
This is the flow your integration will have to follow to authenticate to UEF, each of these steps will be reviewed in the following section